Mastodon is the new very promising social network. Here are 10 steps of creating your own absolutely free Mastodon server
What is Mastodon?
In simple words, it is a Twitter analog that is organized like Discord. Everybody can have their own server, and users can visit any server using the same username. The huge difference (and not a pleasant one, actually) is that a user has to select their main “server” to which their user belongs. Also, the founder chose strange naming like “toot” for “tweet” and “boost” for “like”.
Other than that, the UI for the end-user is very intuitive.
Creating your Mastodon server
1. Create your AWS account
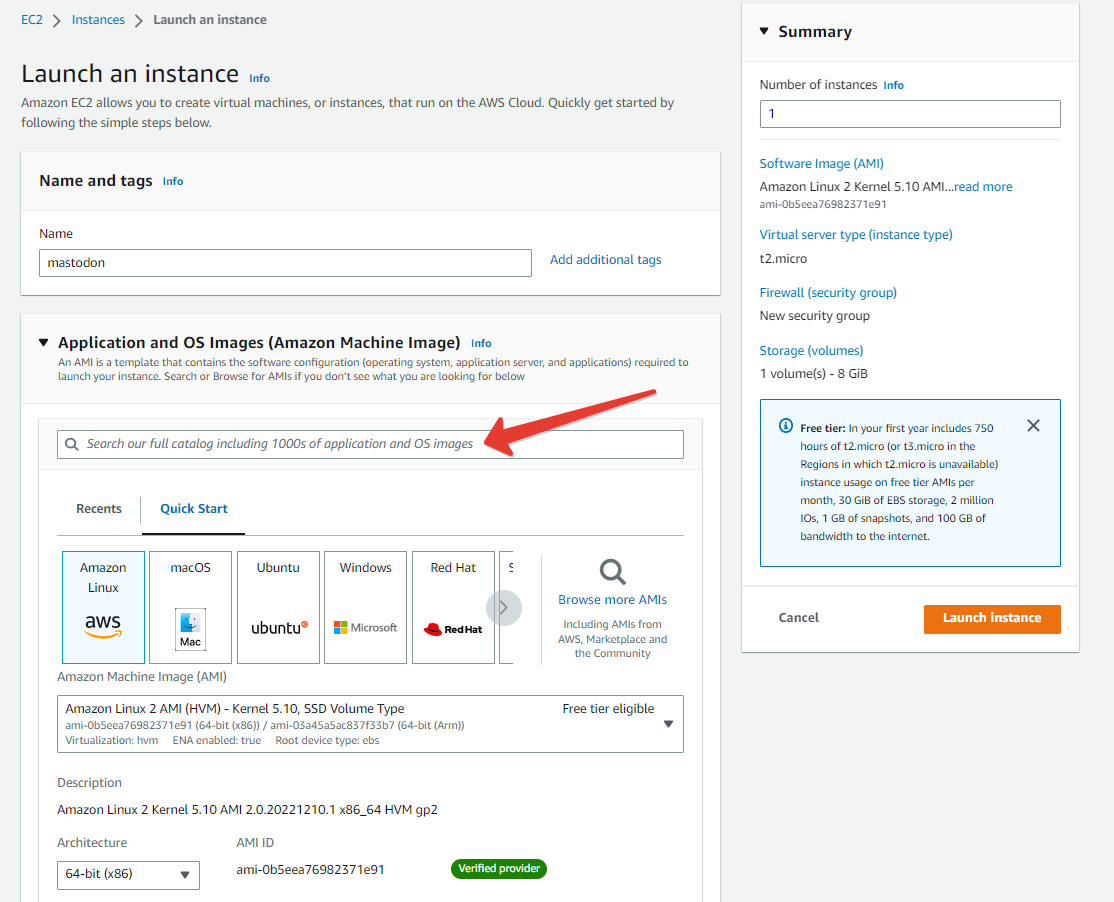
2.Go to EC2 dashboard and create a new instance. For the type, I recommend “t2.micro” as sufficient for beginning. Also it is free (if you do not go above the free tier limits).
3. When selecting an image, search for Mastodon
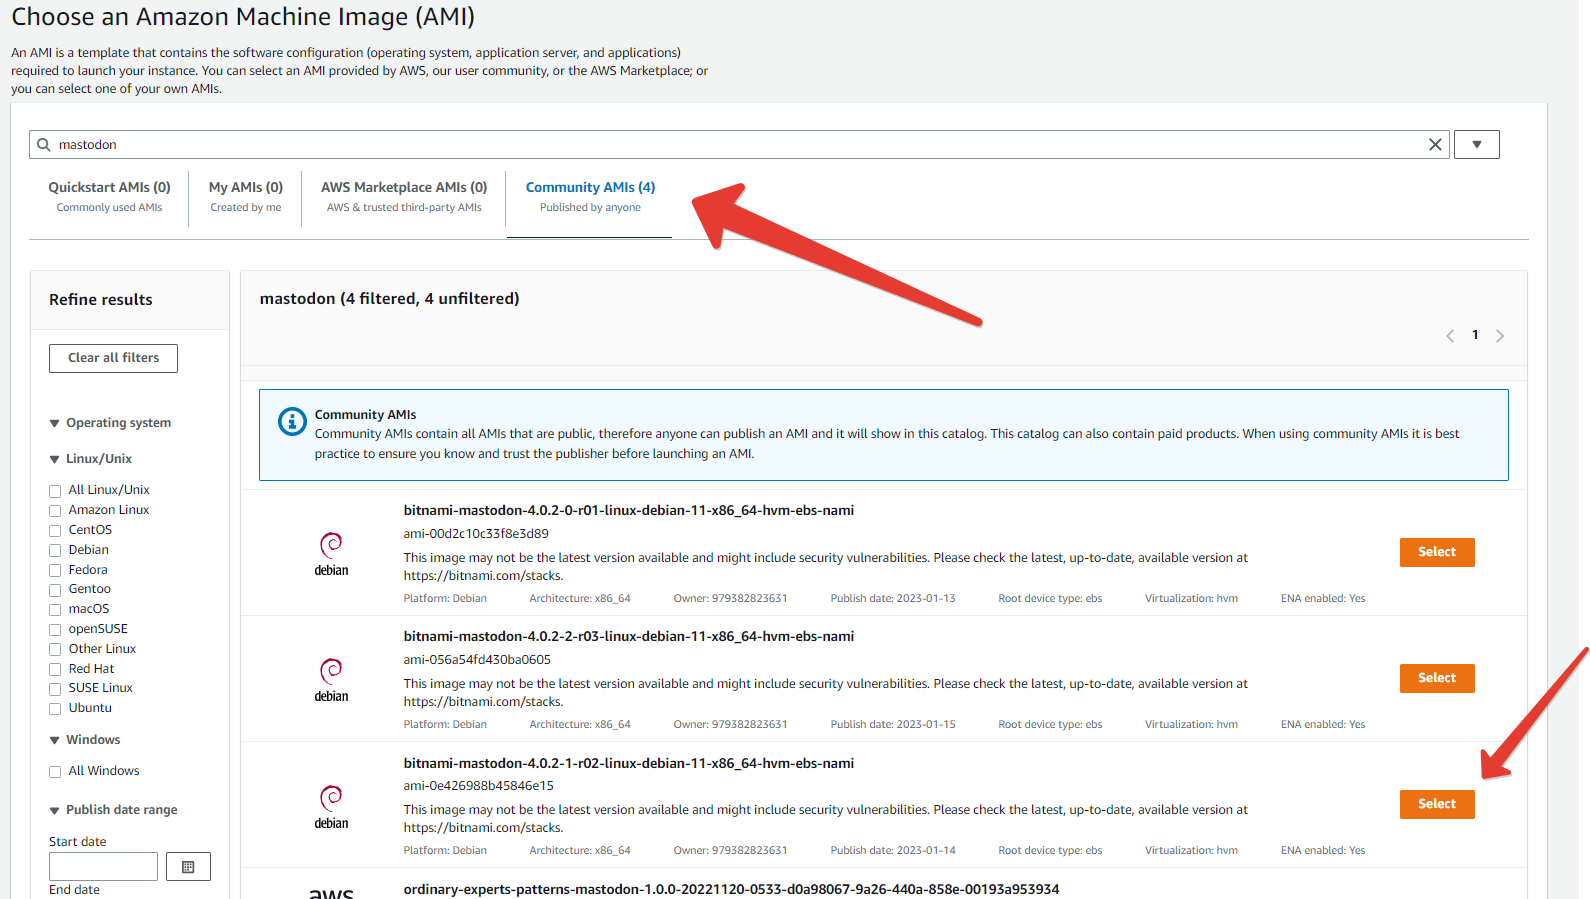
In the new window, go to “community AMIs” and select the latest bitnami build
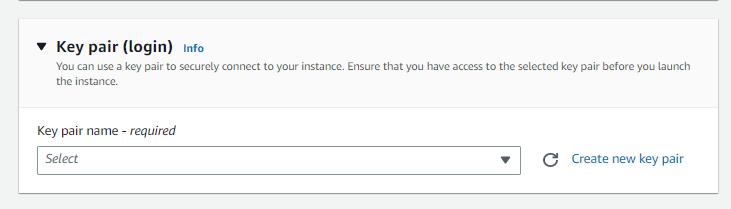
4. You will be back in the creation page. Create a new key pair and remember where you saved the key
6. Go to the EC2 page again, go to Elastic IPs in the left navigation panel
7. Create a new Elastic IP with default settings, then select it, press “Actions”->”Associate Elastic IP address” in the upper right corner, and attach the Elastic IP address to the previously created EC2 instance
8. In Route53, create a new A record that points to Elastic IP address
9. Now you can use SSH to login into your EC2 instance with ssh key that you saved on step 4
! For some reason, AWS offers you to login as “admin”. You will not have access with this username. Use “bitnami” instead
10. Follow a simple procedure by running
sudo /opt/bitnami/configure_app_domain --domain yourdoma.in
then
sudo /opt/bitnami/bncert-tool --domains yourdoma.in
Mastodon server is ready to go
You can access yourdoma.in!
Getting your admin login-pass on SSH
If you ssh’ed into the instance, just run
cat bitnami_credentials
Getting your admin login-pass via EC2 dashboard
1. Go to the EC2 dashboard
2. Select your mastodon instance
3. Select “Monitor & troubleshoot” -> “Get system log” in the upper right corner
4. In the new window, scroll up and you will see your admin login-pass